Saturday, August 26, 2017

Sarit's work

Hello dear readers,

This is how our apartment 7-story building looks today.  The exterior is being renovated.  It will probably take a long time to finish and it's a real pain in the neck to live with.  You will understand that these are no conditions for working on miniatures.  Most of the days I stay out. Can't stand the noise.  The nights are better.  We can open the windows to let some fresh air in.  The only "good" thing is that my husband is still recuperating at the clinic and is saved from the going on chaos.


Some of you may remember the workshop I hosted a year ago in which  Sarit taught us how to work with polystyrene.  I have yet to finish my project. Instead, with Sarit's permission, I'll show you her stunning antique shop.  The structure is all polystyrene.


You can see more photos in Sarit's  a/m link.


Notice the amazing floor.


Sarit is a most talented miniaturist, an artist, a generous friend and a great teacher.
I'm urging her to open a blog.  It can be in Hebrew.  Almost everyone has translation facilities.

One of the reasons I did not get to work on my own project is that I have no  room to display a large  piece and prefer to work on smaller scales.  But I promised myself to finish what I started.
A flower shop is what I have in mind. (Ojala)


I wish you all a lovely Sunday with blessings.


Tuesday, August 15, 2017

A teapot shop - 3rd and last part

Hello dear readers,

Finally the hanging tea shop facade is finished.

The roof is made from 3 rows of ceramic tiles glued on a piece of card stock.
The lamp is made from a bead and findings.
The shop's sign is  printed in green and framed, as the windows, under acetate.
The wooden rectangle is what the box will stand on.


I named the shop "Choopchick", in Hebrew.  A nickname we use here for the little knob on top of every teapot's lid.   I'm not sure what the origin of this nickname is.

I also added triangles made of sturdy clay stones to the sides at the top of the box in preparation for the roof.  If you look carefully you'll see a hole in one of the stones, above and in the middle between the two windows.  I pierced the stone while the clay was still wet.  The lamp will be fixed to the hole.


A trial fix to see how the box will look with the roof on .


Finally, the lamp fixed, the roof painted and permanently glued on.  Also the part underneath painted and fixed.  Now the house stands firmly on its own as well as hangs on the wall.


A look at the box from the back.


From the side.


Hanging on the wall.


Not every one has access to a kiln and ceramic clay, but the stones can substituted with egg carton bricks or wooden strips, according to the imagination.

This one is the 23rd of my shops.  Some of them are over 10 years old and all have Hebrew names.  I made many more, as gifts to  close friends and beloved family members.  Except for going over with damp cloth once in a while they all look as good as new.

I wish you all happy creative days with blessings.


Friday, August 11, 2017

A Teapot shop - Part 2

Hello dear readers,

You've seen the merchandise in the shop's window and now I want to show you how it looks inside before the front cover.

Four square wooden pieces are glued to the top part corners.  Two large craft sticks are cut and glued on top of them to prevent the cover from caving in.


The card paper cover.


A piece of  clear acetate, cut to size, is glued to the undersides of the opening in the card cover.
The whole piece is glued to the box.


Material used for the false windows.

A plastic fruit basket.  The cut out side will make two windows.


Here you can see the windows, each one is framed with 4 matchsticks and painted with green acrylic paint.  I glued on pieces of clear acetate underneath.  You can see here how I make the inside of the windows using narrow pieces of lace and a magazine cut out.  The 1/4" square dowel is for the windowsill.


Assembled and ready for the cover.


Now comes the fun part of decorating the cover with ceramic stones.  I still have to make a roof,
a shop sign, a "lamp" and a flat stand for the shop so it can  either hang on a wall or stand up. I'll  try to finish the project this weekend and post the third and last part early next week.

I wish you all a wonderful summer weekend and blessings.


Sunday, August 6, 2017

A Teapot shop front - Part one


Hello dear readers,

For making this little project I use a small, rectangular shallow wood box.  It originally contained delicious dried figs.  Alas, can't  be found  anymore on the market but I saved some empty boxes.
I never throw away wooden boxes no matter what size.


Here is a photo of  one of my hanging shops.  The following photos will show how I make them.


First thing I do is drill two holes to thread a wire for hanging the box.  I make sure it's right in the middle so that the box will hang straight.


After installing shelves made from tongue depressors,  I fill them with mechandise, usually minis in my stash and items I create myself.  This time it's going to be teapots but very small ones.  (All the  1/12" scale teapots I created last week are too large for this shop.)

There were 4 silver plated little teapots sent to me by  blog friends.  I had to add more to fill up the shop's window.

Assembled some metal beads and jewelry findings as you can see in the photo below.


Glued them together.


Added white Fimo parts and baked them together.


I love the combination of shiny chrome and white ceramic.


I hope you are all having a lovely Sunday.  The best to all and blessings.


Wednesday, August 2, 2017

Miniatures made from scraps

Hello dear readers,


these are hot August days we are enduring right now.  I'm either on my daily visits to my husband at the recuperation clinic or at home.  Both places are air-conditioned else I'm not sure if I could be able to do any work.

I decided to make miniatures from scraps and things lying around.


Kitchen scales. The body is made from  painted styrofoam  market trays. The metal plate above is part of a Hanukkah candle holder.  These are sold at craft stores in packs of nine at about 25 cents of a US$ each.  The  round balance gauge is a printable from the net inside a pill bubble.


Among the things in Maria's parcel of gifts were three rather large mushrooms, probably designed to be planted in a garden scene pot.  This is a teapot made from one of them.  The two others will be turned into tiny fairy houses.


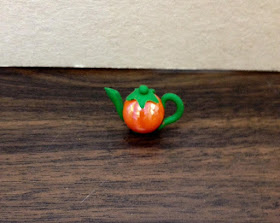
The fairy house mushroom teapot led on to other teapot houses made from Fimo covered scraps of craft wood.


Here is a teapot made from a glass bead.  I bought a bracelet strung on an elastic band with eleven of the same bead and tiny silver caps separating one from another.  This too was a cheap find at 0.25 US$. ( I can't resist beads, especially at this price.)  The other ten will be turned into
hookahs.


I am working on another wall hanging shop.  I hope to able to fill the window with teapots but the ones you see in the photos above are too large for the scale.  I'll try to show you how I make the
box in my next post.

A warm welcome to my new followers and blessings to you all.